
Blog
Chimney Tuckpointing Indianapolis: What to Know Before You Call
Deteriorating mortar joints are one of the most common chimney problems in Indianapolis. Here is what chimney tuckpointing involves and when to stop waiting.
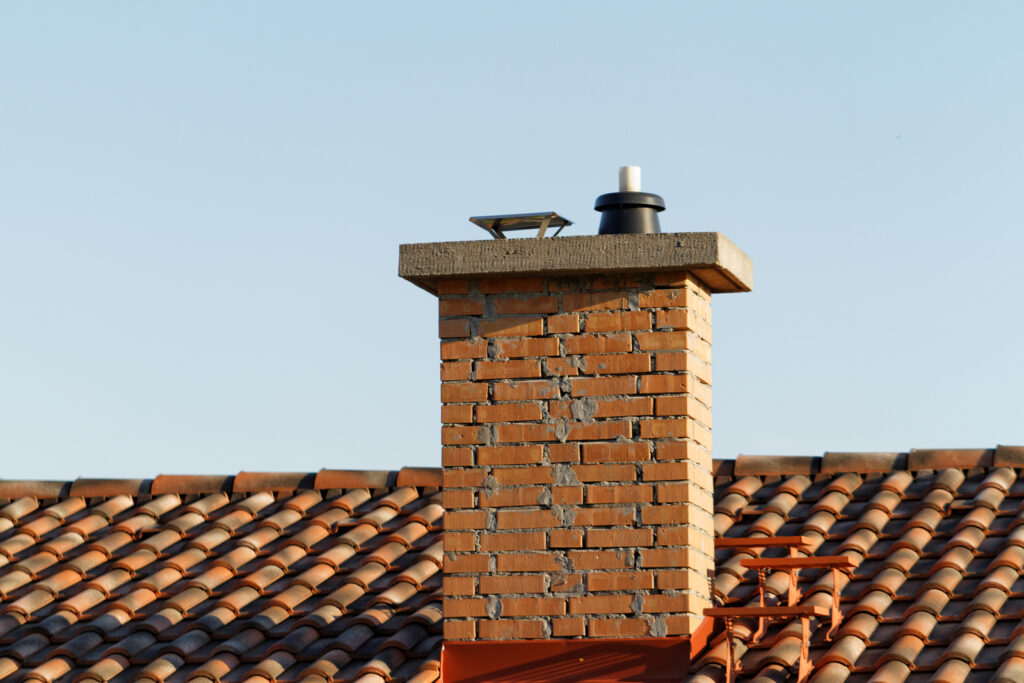
Mortar joints are the quiet part of a chimney. Most homeowners in Indianapolis never think about them until water starts showing up in places it shouldn’t. Chimney tuckpointing is the repair process that addresses worn or cracked mortar joints before that water gets a chance to do real damage. It is one of the most common masonry repairs on older brick chimneys in central Indiana, and understanding what it actually involves helps you make a smarter call when the time comes.
What Tuckpointing Actually Is and What It Is Not
Chimney tuckpointing means removing deteriorated mortar from the joints between bricks and packing in fresh mortar. A mason grinds or chisels out the old material to a depth of about three-quarters of an inch, then fills the joint with new mortar that matches the original mix as closely as possible. The goal is a weathertight joint that bonds properly to the existing brick.
Some people use the term to mean any cosmetic mortar work. That is a loose definition. True tuckpointing removes enough of the failed material so fresh mortar can grip the brick on both sides. A thin skim coat pressed over crumbling joints is not tuckpointing. It tends to fail within a season or two, especially in a climate with hard freezes.
Repointing is a term you will also hear. Most masons in Indianapolis use repointing and tuckpointing to mean the same thing. In some parts of the country, tuckpointing refers to a decorative two-color technique where a thin ribbon of contrasting mortar is inlaid into the joint. In everyday use here, both terms mean the same repair: grinding out and replacing failed mortar joints.
How Mortar Joints Fail in Central Indiana Winters
Indianapolis sits in a climate zone that cycles through roughly 100 freeze-thaw events each year. Water gets into hairline cracks in mortar, freezes overnight, expands, and widens the crack. Repeat that process across an entire winter and even sound-looking mortar can deteriorate quickly. Chimneys take the worst of it because they are fully exposed on all four sides.
Older homes in Indianapolis, particularly those built before 1970, often used softer lime-based mortars. That mortar was designed to be sacrificial, meaning it was meant to wear before the brick does. That system works, but it also means mortar on a 50-year-old chimney may need attention even if the bricks still look fine. Harder Portland-cement mortars from later decades resist moisture better initially but can trap water against the brick when they do crack.
Wind direction matters too. The north and west faces of a chimney usually show joint erosion first in this region. A mason doing an inspection will typically pay closer attention to those faces when assessing how far the damage has progressed.
How to Tell If Your Chimney Mortar Joints Need Tuckpointing
You do not need to climb on the roof to get a general sense of the mortar condition. From the ground with binoculars, you can spot joints that look recessed, crumbly, or discolored compared to the rest of the chimney. Gaps wider than about an eighth of an inch are a clear sign the mortar has pulled away from the brick.
Inside the firebox, check the mortar between the firebricks on the back wall and sides. Cracked or missing joints there are a different repair than exterior tuckpointing, but they point to the same underlying issue: mortar that has given out. White staining on the exterior brick, called efflorescence, often means water is already moving through the joints and carrying mineral deposits to the surface.
How to Assess Your Chimney Mortar Joints Before Calling a Mason
- Stand back from the house and scan the chimney with binoculars on a dry day
- Look for joints that appear darker, recessed, or crumbling compared to surrounding courses
- Check whether any bricks have shifted or look out of line, which can signal deeper mortar failure
- Run your finger along accessible mortar joints at the base of the chimney and note whether material crumbles off easily
- Look for white efflorescence stains on brick faces, a sign water is moving through the joints
- Check the flashing at the roofline around the chimney for gaps or lifting, which often accompanies mortar problems
- Note any interior water stains on the ceiling near the fireplace, which can point to joint failure above the roofline
- Consider when the chimney last had any masonry work, since mortar on most chimneys needs attention every 25 to 30 years
What the Chimney Tuckpointing Process Looks Like from Start to Finish
A mason starts with a close inspection, usually from the roof, to map out which sections of the chimney need work. Not every joint fails at the same rate, so good masons mark the areas that actually need grinding rather than treating the whole chimney as one uniform job.
Grinding comes next. An angle grinder with a diamond blade removes old mortar to the right depth without damaging the brick face. This step is loud and dusty. After grinding, the mason blows out loose debris and dampens the joints slightly so the new mortar does not dry too fast and crack before it cures.
Fresh mortar goes in with a tuck pointer, a narrow tool that fits the joint width. The mason works in sections, packing the mortar firmly so no voids remain behind the surface. Once the mortar firms up to the right consistency, the joints get tooled to a concave or flush profile that sheds water. Full cure takes about 28 days, though the chimney can typically be used after a week in warm, dry weather.
What Mortar Mix Is Right for Indianapolis Chimneys
Mortar hardness should match the brick, not exceed it. On older soft brick, a Type N mortar with a higher lime content is usually the right call. Type N mortar is flexible enough to move slightly with the brick through freeze-thaw cycles without cracking or pushing against the brick face. Using a harder Type S or Type M mortar on soft historic brick can cause the brick itself to spall and crack over time.
On newer chimneys built after 1980 with harder brick, Type S mortar is often appropriate because it offers better compressive strength and moisture resistance. A mason should assess the brick hardness before choosing a mix. Color matching also matters. Matching the original mortar color is partly aesthetic, but a dramatically different color can also signal a mismatch in composition that affects long-term performance.
What Happens to a Chimney If Tuckpointing Is Delayed Too Long
Joint failure that goes unaddressed for several seasons tends to escalate. Water that enters through open joints saturates the inner wythe of the chimney wall. In hard freezes, that moisture expands and can displace bricks or crack them from the inside out. At that point, chimney tuckpointing alone is no longer enough. The repair shifts to full brick replacement, which is a longer and more involved job.
Prolonged water intrusion can also damage the smoke chamber, the damper, and the firebox liner. Once the liner cracks, the repair cost and scope increase considerably. Catching mortar failure at the joint stage, before water reaches the inner structure, keeps the repair manageable. Most masons in Indianapolis will tell you the same thing: a chimney that gets attention every 25 to 30 years rarely needs dramatic reconstruction.
Frequently Asked Questions
How is tuckpointing different from repointing?
In most of the United States, including Indianapolis, masons use the two terms interchangeably. Both refer to grinding out failed mortar joints and packing in fresh material. In some regions, tuckpointing specifically describes a decorative technique where a thin line of contrasting mortar is inlaid into the joint for visual effect. For practical chimney repair purposes, either term means the same process: removing deteriorated mortar and replacing it properly.
How long does chimney tuckpointing last?
A well-done chimney tuckpointing job using the correct mortar mix typically holds for 25 to 30 years on a chimney that is otherwise sound. Longevity depends on the quality of the original brick, the mortar type chosen, and how well the chimney cap and flashing are maintained. A chimney with poor cap drainage or failed flashing will see mortar joints fail sooner because water never fully drains away from the joints between rain events.
Can tuckpointing be done in winter or only in warmer months?
Mortar needs to cure above freezing to bond properly. Most masons in Indianapolis will not do tuckpointing when overnight temperatures drop below 40 degrees Fahrenheit, because mortar that freezes during the first 24 hours of curing will not develop full strength. Spring through early fall is the reliable window. Some contractors work into late October with heated enclosures, but that adds complexity and is not the norm for standard repairs.
Does tuckpointing fix a chimney that is already leaking?
Chimney tuckpointing addresses one of the most common sources of chimney leaks, which is failed mortar joints. If open joints are the cause, fresh tuckpointing done correctly will stop that water path. However, a leaking chimney can have multiple entry points. A cracked or missing chimney cap, failed flashing at the roofline, or a damaged crown can all let water in regardless of joint condition. An inspection before the repair helps identify all the sources so nothing gets missed.
The Bottom Line on Mortar Joints
Mortar joints on a brick chimney are a wear item, not a permanent part of the structure. Central Indiana’s freeze-thaw cycles mean most chimneys need chimney tuckpointing at some point, typically around the 25 to 30 year mark. Spotting the signs early, recessed joints, efflorescence, or crumbling material, keeps the repair straightforward. Waiting until bricks shift or water reaches the inner structure turns a manageable masonry job into a much bigger project. If your chimney is showing any of the signs covered here, getting a mason out for an inspection is the next step.